
How to Start Learning Drawing from Scratch: A 30-Day Plan

Learning to draw becomes much easier when you replace one huge goal with a sequence of small, repeatable skills. You do not need to begin with a realistic portrait or a complicated painting. Your first month should train your eye to observe, your hand to respond, and your brain to simplify what you see.
Before you begin
Keep the setup simple: one graphite pencil, an eraser, a sharpener, and a sketchbook. That is enough for most of the work in this plan. Aim for 20 to 30 focused minutes a day and keep every drawing, including the awkward ones. They become evidence of progress later.
Week 1: Build hand control
Spend the first week on lines and simple forms. Draw straight lines, curves, circles, ellipses, boxes, cylinders, and spheres without a ruler. The goal is not perfect geometry. The goal is better control.
- Day 1: long and short lines in different directions.
- Day 2: circles and ellipses at different sizes.
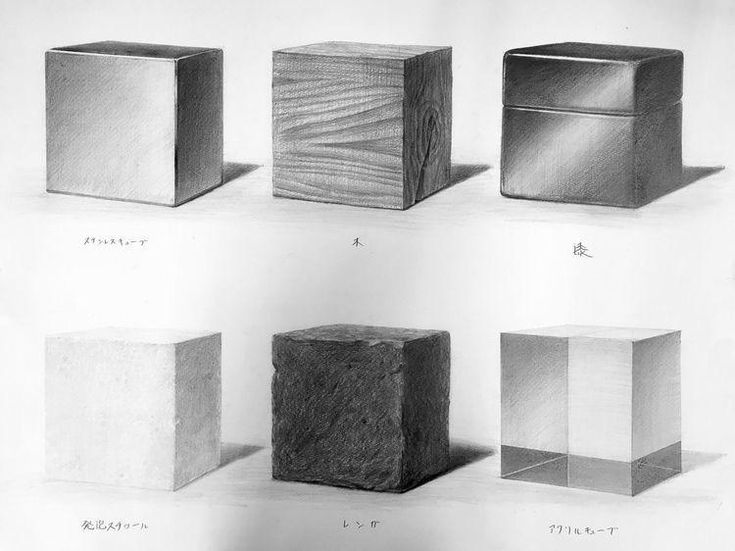
- Day 3: cubes, cylinders, and spheres.
- Day 4: repeat the same forms at different scales.
- Day 5: simplify everyday objects into basic forms.
- Day 6: combine two or three forms into one object.
- Day 7: repeat the exercise that felt hardest.
Week 2: Understand light and shadow
Now introduce value, the range from light to dark. Make a five-step value scale from the white of the paper to the darkest tone you can create. Then apply the same idea to a sphere, cube, and cylinder.
Look for the light side, core shadow, cast shadow, and the transition between them. Do not chase texture yet. If the large value groups read clearly, the drawing already feels three-dimensional.
Week 3: Train observation and proportion
Choose simple real objects such as a mug, bottle, fruit, or small box. Before drawing details, compare height to width and identify the largest shape. Use light construction lines and correct the proportions before shading.
A powerful exercise is to draw the same object from two different angles. It teaches you that drawing is not about memorizing an outline. It is about understanding a form in space.
Week 4: Complete a small project
Build a simple still life with two or three objects. Start with the composition, establish the main proportions, then develop values from broad shapes toward smaller details. Spread the project across several sessions instead of trying to finish everything at once.
On the final day, place this drawing next to something from Day 1. Write down three things that improved and three things that still need work. That short review is more useful than simply deciding whether the drawing is “good” or “bad.”
Common beginner mistakes
- Adding details before the proportions are stable.
- Pressing too hard with the pencil too early.
- Erasing every uncertain line instead of learning from it.
- Comparing your first month with someone else’s tenth year.
- Buying more tools instead of increasing practice time.
What to do after Day 30
Choose one direction for the next month: portrait drawing, still life, perspective, or a color medium. Your first month has already given you a useful foundation in line, shape, proportion, and value, so the next subject will make more sense.
Progress rarely comes from one heroic five-hour session every two weeks. It comes from regular contact with the skill. Twenty focused minutes a day can quietly transform your drawing over a few months.
Share your practice in the Palette Social Community Feed and compare your Day 1 and Day 30 drawings.

Responses